
It’s not as difficult as you might think.
Metal roofing is becoming more popular and you may be considering upgrading. But how difficult can it be to install? Metal roofing is more difficult to install than traditional asphalt roofs, but that doesn’t mean it is impossible.
Metal Roofing Materials
Angle Grinder
Band Saw
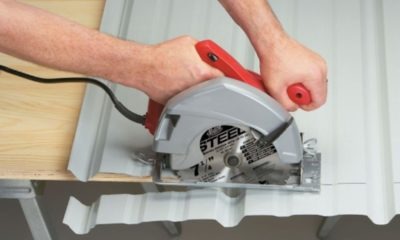
Circular saw
Metal Air Shears
Power Drill
Saw Horse or Work Bent
Tarps
Tin Snips
Step-by-Step Guide to Cutting Metal Roofing
Now, let’s get to the fun part: How to cut your metal roof correctly..
We can use the same steps for all types of metal roofing.
Step 1: Decide how many panels are needed for your roof.
You can stack them and arrange them in a place where they are easy to cut. This guide will help you measure your roof and determine the number of panels you need. Triple-check your work.
Step 2: Draw guidelines on the metal sheets to indicate where you want to cut.
Metal roofing is not an easy material to work with so it is important to measure accurately and mark your measurements. Use a straightedge to draw lines on your sheet of metal. This will help you determine where your cuts will be.
Step 3: Get ready!
After you have taken all the measurements and marked the metal panels, it is time to put on the safety gear. You will get metal shavings and pieces flying everywhere when you cut metal. It is important to protect your skin and eyes.
Step 4: Get started cutting.
There are a variety of tools that can be used to cut metal. Each tool has its own ideal method.
Tin snips allow you to easily make small cuts without having to use a saw. Tin snips can be used to cut metal like scissors, but it is important to take your time and make sure there are no mistakes.
Power shears are faster and easier to use than manual methods. The power shears look like a power tool, but with shears at the end. Attachments can be purchased to convert your power drill into an air shear. However, this will not cause hand cramps.
A circular saw or nibbler is the best choice if you need to cut multiple sheets at once, or if you just need quick straight cuts. With ease, a circular saw can cut through multiple sheets of metal. A nibbler allows you to make precise cuts and slow down the circular saw.
Step 5: Make vents and pipe boots.
It is necessary to create spots for your vents and pipe boots so that they can fit into the metal paneling. You can trace the area you want to cut and then make a pilot hole. You can create a small hole with a drill bit to serve as a point of departure for your tin-snips. With that, you can then easily cut along the guideline. Make sure to cut the right size.
Step 6: Now you’re ready for installation!
Once you have cut all of your pieces, it is time to install them. You can find more information on how to cut metal here.
How to Install a Metal Roof
Call our team at All Star Roofing if you feel the task of installing metal roofing is too difficult. Our team of professionals will do the job right and you can relax knowing that this will be your last roof. For more information on how to get the best-in-class aluminum roof for your home, call us or send us an email. We are looking forward to hearing from you!
This post was written by a roofing specialist At All-Star Roofing. We offer the best roof repair in Tampa Bay FL. We are a family-owned and operated Sarasota roofing business, and we strive to be the best in our industry. Our family has been in the Tampa Bay area for over 60 years, and our objective has always been to provide roofing services at a fast, reliable, and competitive rate. All-Star has a tradition of quality workmanship, servicing residential and commercial properties.